Over 100 industry awards, accolades, and achievements showcase our quality and commitment to client success.
Trusted by 500+ active clients.
In the previous post, I explained how to install OpenCart to get started with your Ecommerce website. It is super easy and quick as you begin to get the hang of it.
This post, however, is a step further and a little advanced as you begin to manage products. It will cover the complete management and organization of products in two steps.
1. How to add product categories
2. How to add new products
Without any further ado, let’s get started:
Table of Contents
Adding product categories is a great way of organizing your products. It makes it easy for the customers to look around the product. Organize a product portfolio by following the directions below.
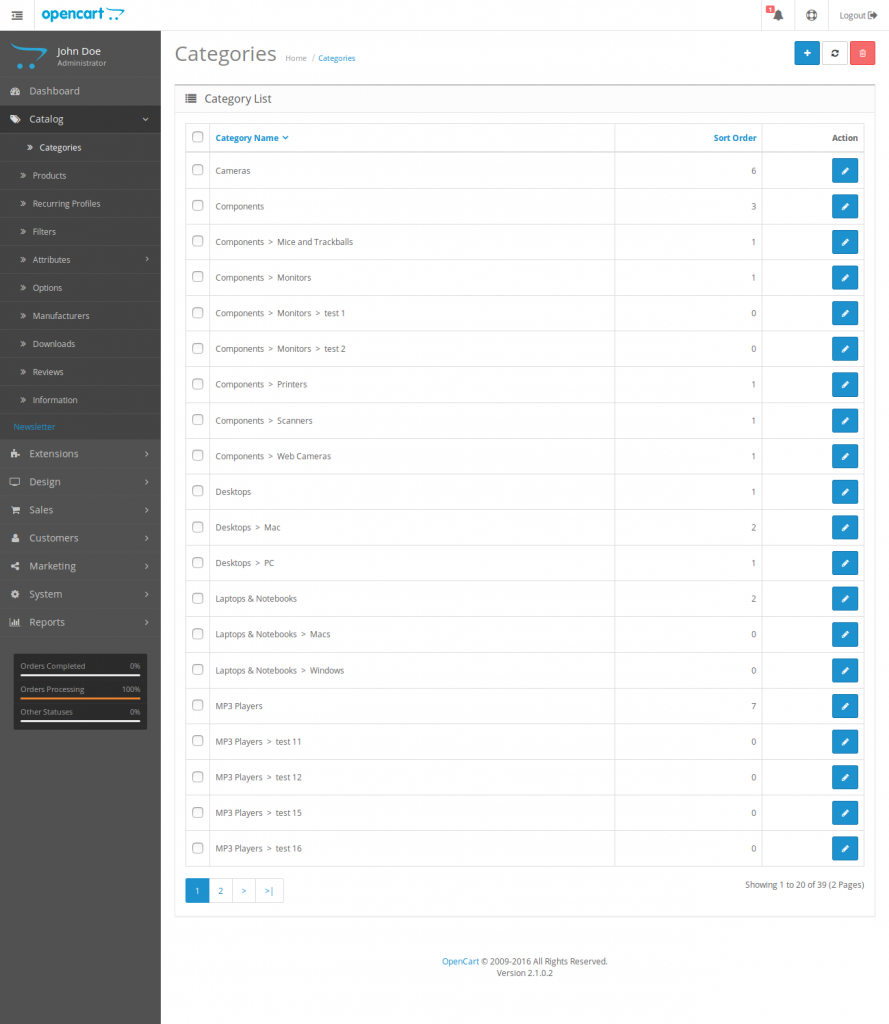
First things first, login to your OpenCart admin panel. Go to the dropdown for “Catalog”, which is placed right in main navigation menu, and choose “Categories”. As you do that, a list of categories will appear, you will have three options on this screen: Simply add a new category by clicking on the “+” button located on the upper right corner of the screen, tick a category or two and delete them or edit the current categories.
IMAGE: categories.list
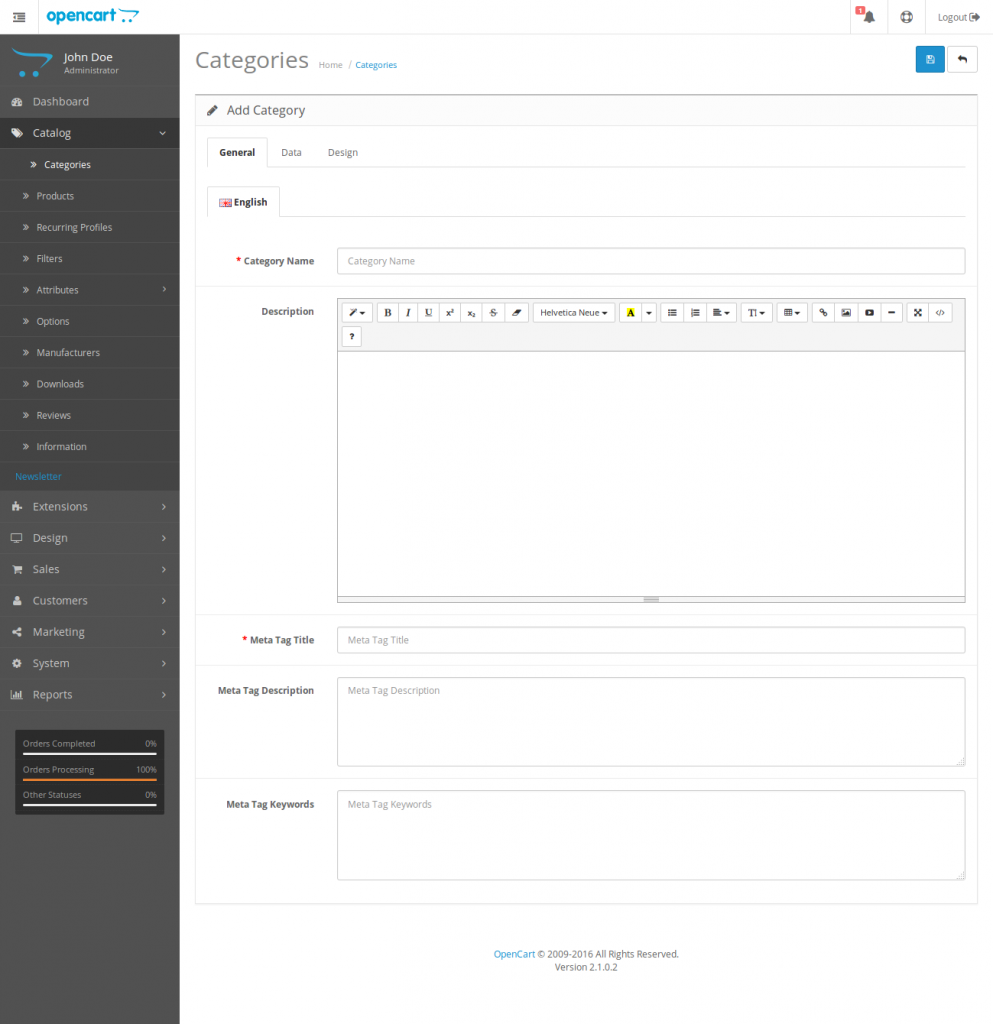
When you choose a category, there are further three tabs to edit: general, data and design. General is the first tab where you just have to input a name for your category, alongside the meta tags and meta keywords to get recognized by the search engine. You also have a choice of putting in the description of the category which will be used for providing a better understanding to the customers regarding the category. However, if the name of the category is self-explanatory, you can leave it empty.
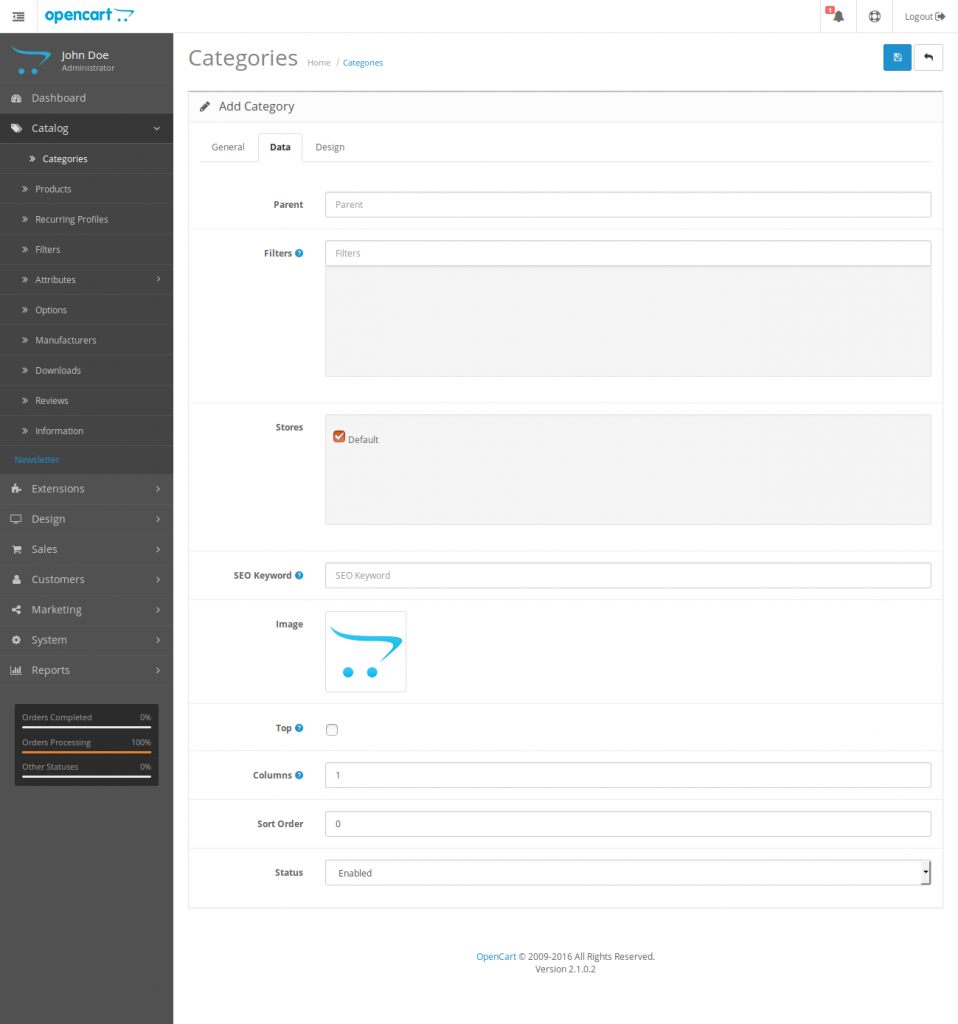
Data is the next tab in the navigation where you need to specify a subcategory as you set a parent category. If the parent category is already set, then a new category will become the child category. Type an existing category in the parent field to mark the current category as a subcategory. If you have a single store configuration, just check “Default” and you are good to go. As you go down, you will see that you can also set an image. Lastly, ensure the status is set to “Enabled” in order to make this category active.
A Design is the last category on the navigations tab. Leave it unchanged if there are no custom category layouts or change it if you have any available. Choose ‘default’ for the former choice.
When all is set, click the ‘save’ button in the upper right corner of your screen to save your progress.
Once you have created product categories for a better organization, the next step is to add products. Here’s how to go about it.
As you go to “Products” from the main dashboard, you will see a product list generated which has the same three options of adding, deleting or editing a product, as in the categories.
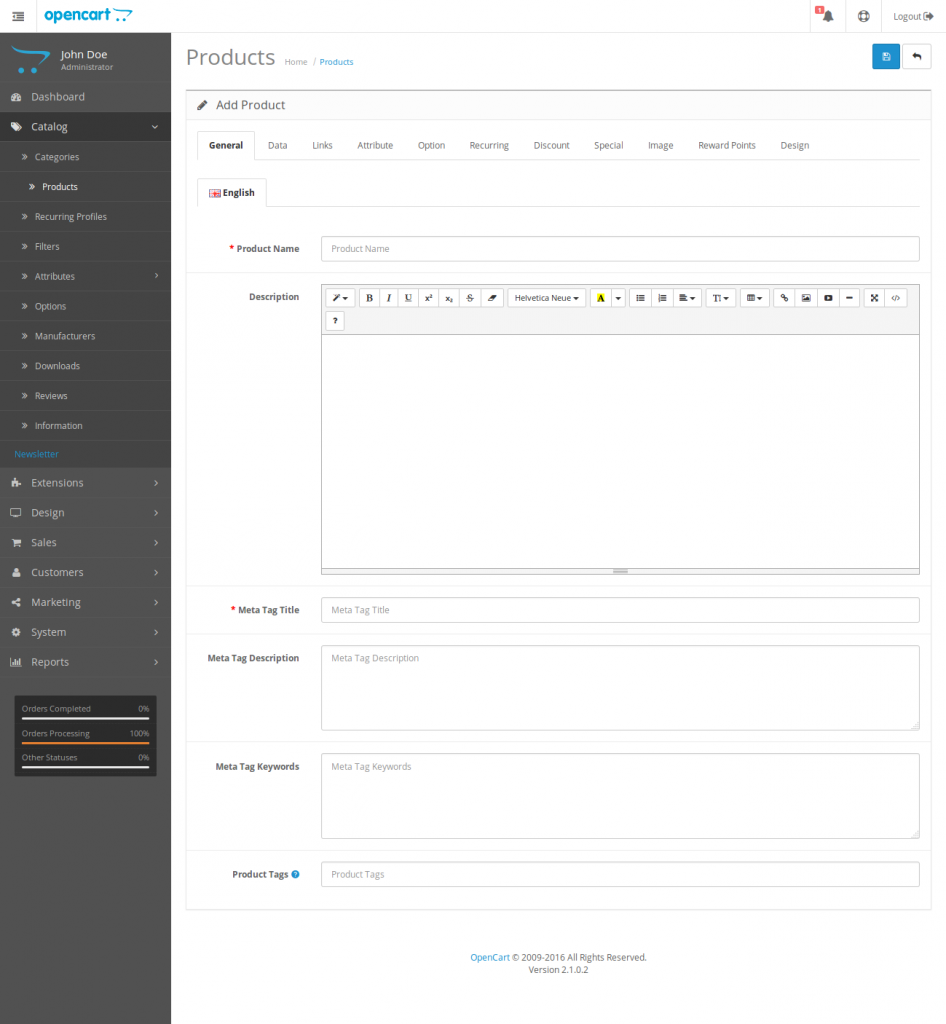
As you press the “+” button from the top right corner of the screen, a new screen will appear with the first tab, out of the many, general. This particular tab asks you to input the simple inquiries of the product name, meta tag descriptions and meta tag keywords.
Next, we have the tab for data which includes the model, SKU to track the inventory, product codes and other details about the products.
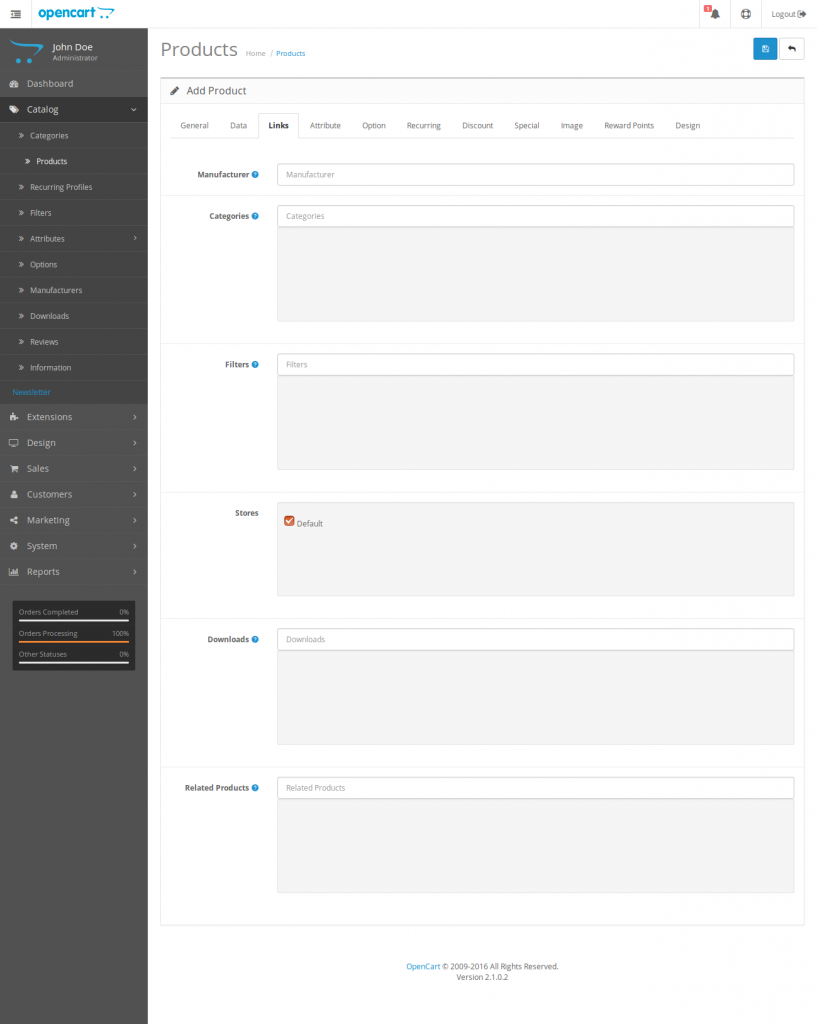
The tab for links inquiries, you need to fill in the details for the manufacturer, categories, any filters, pricing, or downloads. If it is a single store configuration, keep the store to “default”.
OpenCart is super easy to use, even for first-timers or beginners. Simply download OpenCart from here, install it and follow the guidelines. Just remember to get the latest version as it is a lot smoother and user-friendly. Voila! Your ecommerce website is all set and ready to sell.
2602, 26th Floor, Mazaya
Business Avenue, BB2, Jumeirah Lakes Towers, Dubai, UAE
Copyright © Branex. All rights reserved